Transaction types
Sale
Doing a sale:
- Add items to the cart by scanning the product, searching from the KRISP POS, or clicking on the hotkeys.
- Once the items are on the cart, you can alter the quantity, discount, or sales price if needed. You can click on more options
 to change other sales attributes.
 - Click the Proceed to pay button.
-
You will see the checkout screen. Make sure the Sale tab is selected.

-
Select a payment method.
- Enter the tender amount. You can do a split-payment if the user will use more than one payment method (e.g. part-cash, part-credit card). Read more about split-payments.
- Click the Add payment button. On tendering the cash, any change amount will be indicated on the cart.
- Print, email, or email and print if a receipt is required.
- Click the Done button.
After doing a sale, the application will automatically re-direct you to the initial screen and show an empty cart so you can do the next transaction.
Deposit
A deposit allows your customer to reserve items by setting up an installment type payment. Typically, the customer will not receive the reserved item until the full price has been paid, but this depends on your store's preferences.
Starting a deposit transaction:
- Search for a customer to add to the cart.
- Add items to the cart.
- Click on Proceed to pay button.
-
Select the Deposit tab.

-
Choose a payment method.
- Enter in the tender amount.
- Click the Add payment button.
- Print or email the receipt if needed.
- Click the Done button.
Completing a deposit:
-
Retrieve an existing deposit by one of the options below:
-
Scanning the transaction barcode: Enter the customer name in search bar, and then click the transaction from the transaction listing.
-
Using the search bar: Enter in the deposit transaction number, then a list will show up where you can look for the customer name.
-
View transaction: After searching for a customer, click the open popup icon
 . to view more details, and then click the 'View transactions' button.
-
-
Once the deposit is on the cart, click on the Proceed to pay button.
- Choose payment method.
- Enter in the tender amount.
- Click the Add payment button.
- Print or email the receipt if needed.
- Click the Done button.
Layby
A layby allows your customer to pay installments for items in at least two installments. Typically, the customer will not receive the item until the full price has been paid.
Starting a layby transaction:
- Search for a customer to add to the cart.
- Add items to the cart.
- Click on the Proceed to pay button.
-
Select the Layby tab.

-
Choose payment method.
- Enter in the tender amount.
- Print or email the receipt if needed.
- Click the Done button.
Completing layby and applying the final installment:
-
Retrieve an existing layby by using the options below:
-
Using the search bar: Enter in the layby transaction number.
-
Scanning the transaction barcode: Enter the customer name in search bar, and then click the transaction from the transaction listing.
-
View transaction: After searching for a customer, click the open popup icon
 to view more details, and then click the 'View transactions' button.
-
-
Once the layby is on the cart, Cick on Proceed to pay button.
- Choose payment method.
- Enter in the tender amount.
- Click on Add payment button.
- Print or email the receipt if needed.
- Click the Done button.
On account
A customer can do an on account transaction, only if they are set up as an on account customer with available credit, and are not 'on hold'.
Doing an on account transaction:
- Search for a customer to add to the cart.
- Add items to the cart.
-
Click the ellipsis icon
beside Sale and select the Add on account reference option, i.e. the person picking it up.
-
Select the reference (if the account reference is not listed below, the customer is not elligible for an on account transaction).
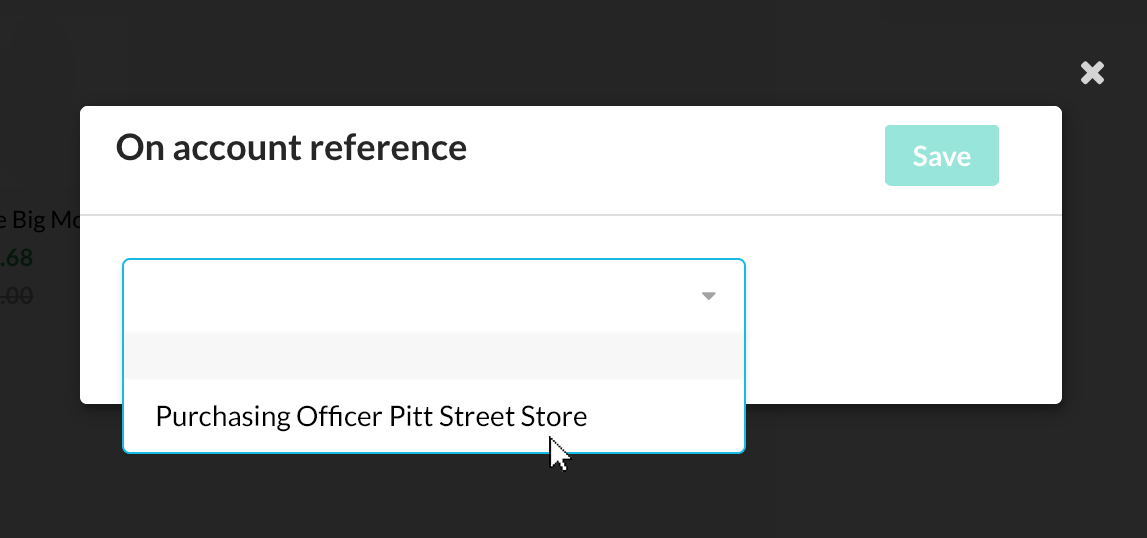
-
Click the Save button on the popup.
- Click on Proceed to pay button.
-
Select the On account tab.

This tab is only clickable when you have selected an on account reference in the cart.
-
Enter in the tender amount. If the customer doesn't have enough credit amount, the transaction will not go through.
-
Click the Add payment button.
- Click the Done button.
Pre-order
A pre-order can be recorded in KRISP POS for items before they're available for purchase in-store.
All pre-order transactions must be paid in full.
Items are then reserved for the customer once they're available in the store for pickup or shipping.
Creating a pre-order transaction:
- Search for a customer to add to the cart.
- Add items to the cart.
- Click on the item name on the cart.
-
Click on the Delivery details tab.

-
On Delivery details tab, you will see delivery options and delivery status fields. For delivery options, you will first choose between None, Pickup in-store, or Shipped:
-
If you choose None, proceed then with making the delivery status to Pending fulfilment.
-
If you choose Pickup in-store, ensure that the delivery status is set to Pending fulfilment and the Pickup location has been selected.
-
If you choose Shipped, proceed then with making the delivery status to Pending fulfilment, and shipping details are entered.
-
-
Click on Update to cart button.
-
Repeat this process for each item on the transaction.
Note that address details will automatically be populated with the customers default address.
-
Click on Proceed to pay button.
-
Choose Pre-order tab.

-
Choose payment method.
- Enter in the tender amount.
- Click on Add payment button.
- Print or email the reciept if needed.
- Click the Done button.
Quotes
Quotes can be recorded in KRISP POS when you need to provide an agreed price for your goods and services to customers. A Quote can later be turned into a Sale by retrieving the Quote and making a payment.
Creating a quote:
- Search for a customer to add to the cart.
- Add items to the cart.
- Click Proceed to pay button.
-
Choose the Quote tab.

-
Print or email the reciept if needed.
- Click the Done button.
Converting a quote to a sale:
- Make sure the quote is in the cart.
- Click Proceed to pay.
-
Choose Sales tab.
-
Choose a payment method.
- Enter in the tender amount.
- Click Add payment button.
- Print or email the reciept if needed.
- Click the Done button.
Reserved
Reserved can be recorded in KRISP POS if you allow customers to reserve items without making a payment.
Starting a reserved transaction:
- In the KRISP POS, selected the item the customer wants to reserve.
- Make sure a customer is added to the cart.
- Click the Proceed to pay button.
- You will be redirected to the checkout screen.
-
Click on the Reserved tab.

-
Click the Done button.
Converting a reservation to a sale:
- Retrieve the reserved transaction using the search bar.
- Once the transaction is on the cart, click Proceed to pay.
-
Click the Sale tab.
-
Choose a payment method.
- Enter the tender amount.
- Click on the Add payment button.
- Print or email the reciept if needed.
- Click the Done button.